
Facebook ads have been a staple of digital advertising for nearly two decades now, so many companies are rightfully asking the same question: “Are they still worth it?”
Facebook is by far the most popular social media platform with just over 3 billion monthly active users worldwide. That means more than a third of the entire global population has a presence on Facebook. It also means that no matter who you’re targeting with your client’s advertising (from Gen Z men to Boomer women), they’re probably on Facebook.
But let’s not just look to the platform’s vast userbase for proof that this type of advertising is worth it. 2024 Facebook ad benchmarking reports show that not only did click-through rates and conversion rates increase last year, but cost per click and cost per lead went down.
Bottom line: Facebook has a wide range of users. Ads are becoming more and more cost effective. And the results are getting better each year.
If you’re picking up what we’re putting down (i.e., that running Facebook ads for your clients is a sure thing), follow along with our guide to mastering Facebook advertising in 2025.
The Basics of Facebook Advertising
Before you can start your first Facebook ads campaign, let’s walk through a few basics. To run Facebook ads for your clients, you need:
- Your own Meta Business Suite account
- Access to your client’s Facebook Business Page
- Access to your client’s Facebook Ads Account
- The Facebook Pixel installed on your client’s website
This allows you to manage Facebook Ads for multiple clients from your own Meta Business Manager account. And by installing the Facebook Pixel, you can properly track results and create lookalike audiences (more on that later).
If your client is setting up their Ad Account for the first time, they’ll need to input a payment method, verify their email address and phone number, and fulfill any other requirements laid out in the Ads Overview dashboard.
Then, they can grant your Meta Business Suite access to their account so you can seamlessly manage their ads for them.
Request access to a client’s Facebook Page using these steps:
- Go to Settings in your Meta Business Suite.
- Under Accounts, click Pages.
- Click the + Add dropdown.
- Click Request shared access to a Facebook Page.
- Type in the name of your client’s Facebook Page or URL and select it.
- Choose whether you need partial access or full control. This will depend on the services you’re providing for them, but if you’re running a full-service agency, you’ll likely need full control of each client’s Page.
- Click Confirm.
Then, use these steps to request access to their Ad Account:
- Go to Settings in your Meta Business Suite.
- From the dropdown menu, go to Accounts > Ad accounts.
- Click the + Add dropdown.
- Click Request access to an ad account.
- Input your client’s ad account ID. (They can find it by going into Ads Manager and looking for the number at the top of the dropdown menu, next to their Page name.)

Source - Choose whether you need partial access or full control. This will again depend on the services you’re providing for them.
- Click Confirm.

Keep in mind that each of these step-by-steps walks you through requesting access. Once you do each one, the client will then have to go into their own Business Suite to approve your requests.
Tell them that to do this, they simply need to go into the Settings area of their Business Suite, then click Requests > Other requests to see any Page or Ad Account requests they need to approve.
Once you’ve taken these steps, take some time to get familiar with the Meta Business Suite. This is the central hub for managing Facebook Pages and their ad accounts. There are several areas that can help you more effectively run ads, like the Ads Manager, Audiences dashboard, Events Manager, and Reporting areas.
Types of Facebook Ads
There are several different types of Facebook ads you can choose from as you flesh out your campaign. Choose the ad type that works best for your business and the type of creative asset you’re wanting to promote.
Let’s walk through what each of these look like and when you should use them.
Photo Ads

Photo or image ads include a single static image and can be used when:
- You need to create a quick ad on the fly
- You want to show off your products
- You want to send people to your website
In fact, one Facebook study found that image ads are the most effective way to drive traffic to your website, sending 1.7x more website visitors than other types of ads.
Best for: You can run this ad type for any client and generate results.
Video Ads

Video ads use—naturally—video content to promote your business and its products or services. There are a few different types of video ads you can run:
- In-feed video ads: Video ads that appear as users scroll down their home feeds.
- In-stream video ads: Video ads that appear in the video player during or between organic videos.
- Reels video ads: Vertical video ads that appear between organic Reels videos.
- Stories video ads: Vertical video ads that appear between organic Stories.
Video ads are perfect for providing context into why your target audience could benefit from your products or services.
Best for: Video ads are best for service-based clients so you can better cater to pain points.
Carousel Ads

Carousel ads are a multi-image ad that users can scroll side-to-side to see each of the included photos. This type of ad is perfect for:
- Showcasing multiple products in a single ad
- Highlighting different features of your product
- Walking users through a process
- Telling a story about your brand or product
You can include up to 10 images (or videos) within a single carousel ad.
Best for: Carousel ads are best for ecommerce clients with product photos to show off.
Stories Ads

Stories ads are image or video ads that appear between user Stories. These are short, punchy, engaging ads that introduce viewers to your business and its products or services.
Many consumers have taken some sort of action with a business after seeing one of their Stories ads. According to Facebook, 58% of consumers have checked out the brand’s website for more information, 50% have looked to websites where they can make a purchase, and 31% have gone to a store to look for the product.
The same source let us in on what Facebook users are looking for from brands when it comes to Facebook Stories:
- 52% want Stories that are quick and easy to understand
- 50% want to be introduced to new products
- 46% want brands to offer tips or advice
Best for: You can run this ad type for any client and generate results.
Messenger Ads

Messenger ads are ads that appear amongst a user’s Facebook Messenger chats. As you can see above, the Jasper’s Market chat is an ad that can be clicked on so the user can learn more about the brand, locations, and products.
Once someone clicks on your ad, you can choose what type of call-to-action you want to display, whether it’s to message your business to learn more, to head to your website, or to shop your Facebook catalog.
Best for: You can run this ad type for any client and generate results.
Collection Ads

Collection ads enable you to showcase multiple products within a single ad. Users can tap on the ad to be taken to a mobile-friendly “Instant Experience,” a fast-loading webpage that makes mobile ads even more effective.
For collection ads, this Instant Experience might be an “Instant Storefront” that leads to your Facebook catalog, an “Instant Lookbook” that showcases your products in action, or an “Instant Customer Acquisition” that leads customers to your website or app.
Best for: Collection ads are best for ecommerce clients so you can show off their products.
How to Create a Facebook Ads Campaign: Step-by-Step
Ready to run a Facebook ads campaign for your marketing agency’s clients? Follow along with this step-by-step guide to make sure you get the best results possible.
Step 1: Create a New Ad Campaign
The first thing you’re going to do is head to your Meta Business Suite and select your client’s account from the dropdown menu. Meta’s Business Suite makes it easy for you to manage multiple clients in one place—simply switch from account to account with this simple dropdown.

Once you’re in the right business portfolio, click Ads Manager in the left sidebar. Select Campaigns from the dropdown menu that appears to get to your client’s list of ad campaigns.
Click Create under the Campaigns header to get started with your new ad.

Step 2: Choose Your Buying Type
Once you’ve started creating a new ad campaign, you’ll see this pop-up appear:

The first thing you need to do is settle on your buying type. There are two options to choose from—Auction and Reservation (previously called Reach and Frequency).
According to Meta, these two can be explained as:
- Reservation: Lets you plan and buy your campaigns in advance, with predictable performance goals and more control over your frequency controls. Ads can be placed on Facebook and Instagram.
- Auction: Offers more choice, efficiency and flexibility, with less predictable results. Ads can be placed across Facebook, Messenger, Instagram and Meta Audience Network.
Auction ads allow for all of the above campaign objectives, while Reservation ad buying only works for Awareness, Traffic, and Engagement objectives. We’re going to be doing this runthrough using the Auction buying type.
Step 3: Choose a Campaign Objective
Next, select your campaign objective from the list above. The ads interface provides examples of when each campaign objective might be used. Let’s walk through each one.
Awareness ads are good for:
- Reach
- Brand awareness
- Video views
- Store location awareness
Any type of business can benefit from brand awareness ads. These focus simply on getting your client’s brand name out there, increasing their Page likes, or reaching a large number of Facebook users.
Traffic ads are good for:
- Link clicks
- Landing page views
- Instagram profile visits
- Messenger, Instagram and WhatsApp
- Calls
Traffic ads work well for most businesses, though you’ll want to focus on businesses who benefit from people clicking on their website (i.e., to buy a product or sign up for a software or service) and move these efforts away from businesses that only operate brick-and-mortar stores.
Engagement ads are good for:
- Messenger, Instagram and WhatsApp
- Video views
- Post engagement
- Conversions
- Calls
Any type of client can benefit from ads focused on engaging their audience. These are meant to get the conversation going around your client and the products or services they offer.
Lead ads are good for:
- Instant forms
- Messenger and Instagram
- Conversions
- Calls
Lead ads are best for service-based businesses that are looking to generate a list of qualified leads to nurture. If you’re running ads like this for your client, make sure you’ve worked with them to create a process for sending their sales team leads so they can continue to follow up with them.
App promotion ads are good for:
- App installs
- App events
Only use app promotion ads for clients who have a mobile app. These ads lead directly to the App Store or Google Play Store so users can download the app.
Sales ads are good for:
- Conversions
- Catalog sales
- Messenger, Instagram and WhatsApp
- Calls
Sales ads work well for ecommerce and SaaS businesses, where a customer can immediately make a purchase or sign up for a service on their own, without having to contact someone or work with a sales rep.
If you also plan to run your ads on Instagram, you can use any objective except for Awareness. Once you select an objective, click Continue.
Step 4: Name Your Campaign
At the top of the next page, you’ll want to give your campaign a name so that you can easily pick it out of your list of ads—especially if you plan to run multiple campaigns at once.

Come up with some sort of naming device that will help you recognize your different campaigns. For example, you might include:
- Objective
- Audience
- Time Frame
And you’ll end up with a campaign name like “Awareness – Gen Z – November.” Customize this based on what works best for your team.
Step 5: Select a Category (if Applicable)
Certain ad categories must be disclosed before they can run. Those ad categories include:
- Financial products and services
- Employment
- Housing
- Social issues, elections, or politics

Select Categorize your ads from this section if your client’s ad falls under one of those categories. The pop-up that appears will help you determine which one you need to choose.
Step 6: Consider Turning on Advantage Campaign Budget
Facebook has an Advantage Campaign Budget feature that can be turned on if you will be creating more than one ad set.

This is a budget optimization feature that helps distribute your budget across ad sets based on which one is performing better. If you want some help with your budget distribution, turn this option on. Otherwise, you can keep it off.
Step 7: Decide to A/B Test or Not
Next, decide if you want to A/B test your ads. This means you create different variations of your ads to see which one performs better.

You can A/B test your:
- Creative: Test different images, videos, copy, or call-to-action
- Audience: Target different segments of your audience
- Placements: See which ad type or location works best
Set a duration for your test as well as the metric you want your test results to be based on. Some of the options include:
- Cost per result (the recommended metric)
- Cost per link click
- Cost per 1,000 Accounts Center accounts reached
- Cost per purchase
If you do choose to A/B test, you’ll be directed to create your ad variation after you create your first variation. If not, simply keep the toggle in the “Off” position and continue on.
Step 8: Set Your Performance Goal
On the next page, you’ll need to set your performance goal. The appearance of this section—along with the options you can choose—will vary based on the campaign objective you initially chose.

This is the section where you’ll also select the Facebook Page where these ads will be running. Make sure to select the corresponding client’s Page from the dropdown.
Next, select your frequency control. This pertains to your ad frequency, or the number of times any one Facebook user can see your ads.
Target frequency is a newer feature that is available for campaigns that run 7 days or longer. This lets you set how often your targeted audience sees your ads, which can be beneficial for staying top of mind. Otherwise, you can set a frequency cap to ensure your audience doesn’t see your ads more than a certain number of times and experience ad fatigue.
Step 9: Decide Whether to Use Dynamic Creative
Next, decide whether you want to use dynamic creative or not.

This means you can input multiple types of creative elements—like images, headlines, and ad copy—and Facebook will generate different combinations of those elements to create variations of your ad.
Unlike A/B testing, you aren’t looking at results to see which variation works best. Instead, you’re simply ensuring your ads don’t all look the same.
Step 10: Set Your Budget & Schedule
Setting your budget and schedule is the next step. You’ve likely worked out an ad budget with your client ahead of time—now, you need to allocate some of that budget to this campaign.

You can choose between a daily budget, where you spend a certain amount every day, or a lifetime budget, where you spend a set amount throughout the entire ad campaign. A lifetime budget requires a start and end date, while you can set a daily budget for your ad and keep it running indefinitely.
So if you choose a daily budget, you’ll just need to select a start date (though you can set an end date as well). If you’re using a lifetime budget, you’ll need to set your start and end dates before you launch.
Step 11: Identify Your Audience
The next step is to choose who your ad campaign will be targeting.

Facebook has an Advantage+ feature that assists users in ensuring they’ve put together the best possible audience for their campaign. However, you can also create your own custom audience.
When creating a custom audience, you’ll input information like:
- Location
- Age
- Gender
- Demographics
- Interests
- Behaviors
- Language
You can also click the Create new dropdown to instead create a Lookalike audience instead of a custom audience.

With a lookalike audience, you can find Facebook users with similar profiles to those who follow your client’s Facebook Page or who have visited your client’s website. This is a great way to build an audience who should align with your client’s customer base.
Step 12: Choose Your Ad Placements
You have two options for choosing your ad placements.

First, you can again select an Advantage+ option, which automatically chooses placements that the platform thinks will maximize your budget and improve your overall performance.
However, you can also select manual placements. If you have a lot of Facebook ads management experience, feel free to choose this option. However, for your first few campaigns, we recommend leaving it to Facebook’s delivery system.
Step 13: Confirm Your Facebook Page
You should have selected your Facebook Page during Step 8. If you forgot, this is where you can confirm you’re creating the ads with the right Page.

This is also where you’ll select an Instagram account if you plan to run the ads on Instagram as well.
Step 14: Create Your Ad
Now it’s time to create your ad visuals. While we talked about six different types of ads, there are going to be three main formats for inputting creative assets—a single image or video, a carousel, or a collection. Start by choosing which one you plan to run.

If you’re using a single image or video, click the Set up creative button and select Image ad or Video ad from the dropdown. From here, you’ll be prompted to upload your visual asset.
This Ad creative section will change depending on which ad format you choose. If you select Carousel, you’ll be prompted to upload up to 10 images or videos. If you select Collection, you’ll be prompted to create an Instant Experience for your ad.
Follow along all of the prompts to ensure you’ve input all ad creative necessary—your visuals, primary text, headline, description, and/or call to action.
Step 15: Set Up Ad Tracking
At the bottom of this page, you’ll have the opportunity to set up ad tracking if your campaign calls for it. You likely won’t have anything to track for basic Awareness and Engagement campaigns, but if you’re collecting leads, sending users to your website to make purchases, etc., you’ll want to be able to track those results.

Click Set up next to the option you need to use (i.e., website events for sales from your site, app events for app downloads) and follow along with the available steps to get your tracking ready to go.
Step 16: Preview Your Ad
As you input all of your ad creative, an ad preview will appear on the right side of your interface. Make sure everything looks good and in its place before you set your ads to go live. You can scroll back up to the Ad creative section to make any changes you need to.
Step 17: Publish Your Ad
Once everything looks good, it’s time to click Publish! Your ads will go through an approval process with Facebook, then they’ll be ready to go live as soon as your start date and time hits.
Step 18: Monitor Your Ad Performance
Although you’ve created your ad campaign, the job isn’t done. You’ll need to consistently check back in with your client’s Ads Manager to monitor performance.
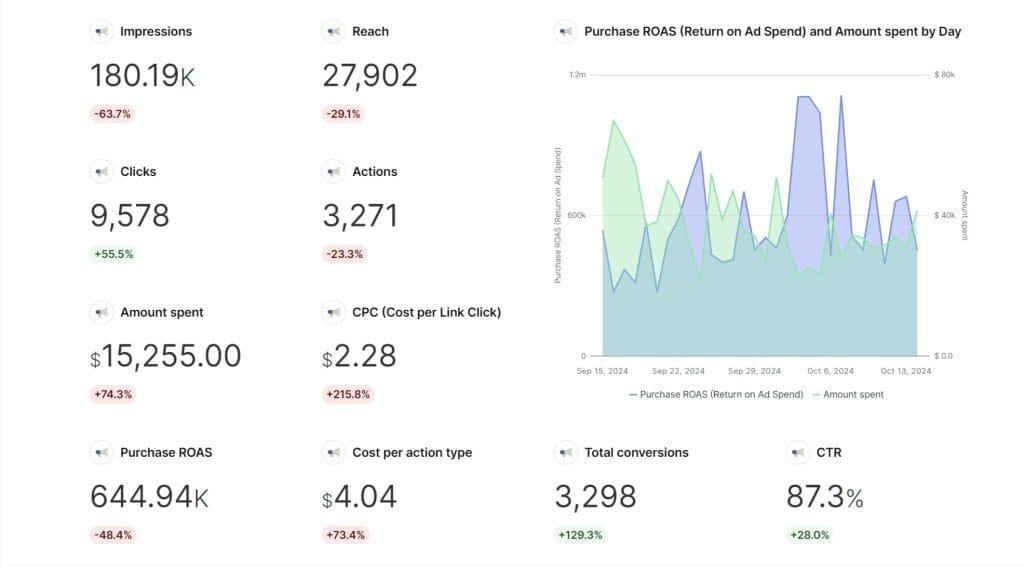
You’ll be able to get a birds’ eye view in the Campaigns dashboard, where you can see Facebook Ads metrics like:
- Results
- Reach
- Impressions
- Cost per result
- Amount spent
You can also dive deeper to see your ad results based on Ad sets and individual Ads. You can make any changes you need to your creative, audience, budget, and other areas while your campaign is live in order to improve your results.
Conclusion
Use this step-by-step guide to help you start running effective and successful Facebook ad campaigns and implement your Facebook ad strategy for your marketing agency’s clients. Then, put together impressive reports showcasing your ad results using Swydo’s comprehensive features.
Ready to master Facebook Ads for your clients in 2025?
Start Your Free Trial Today